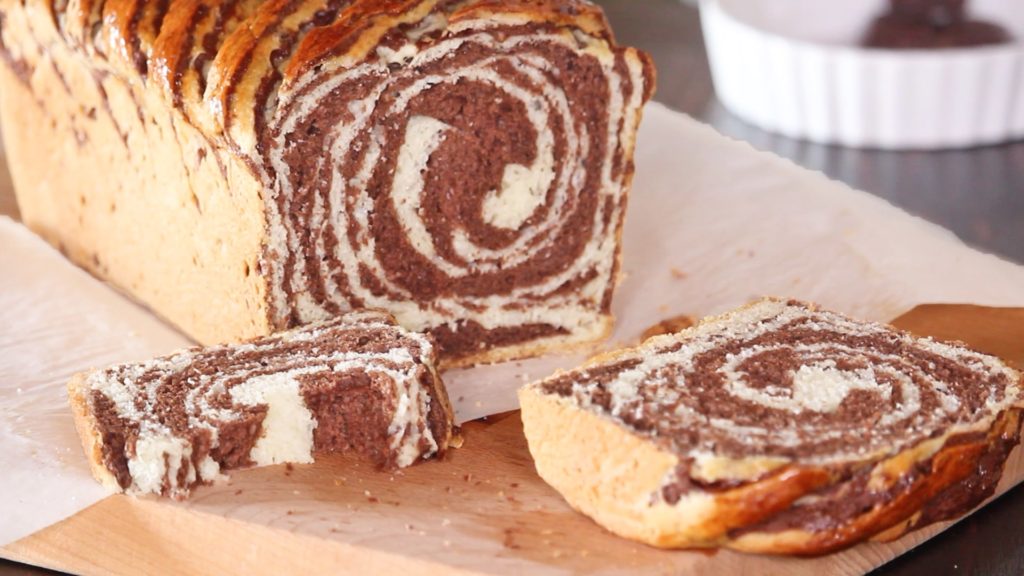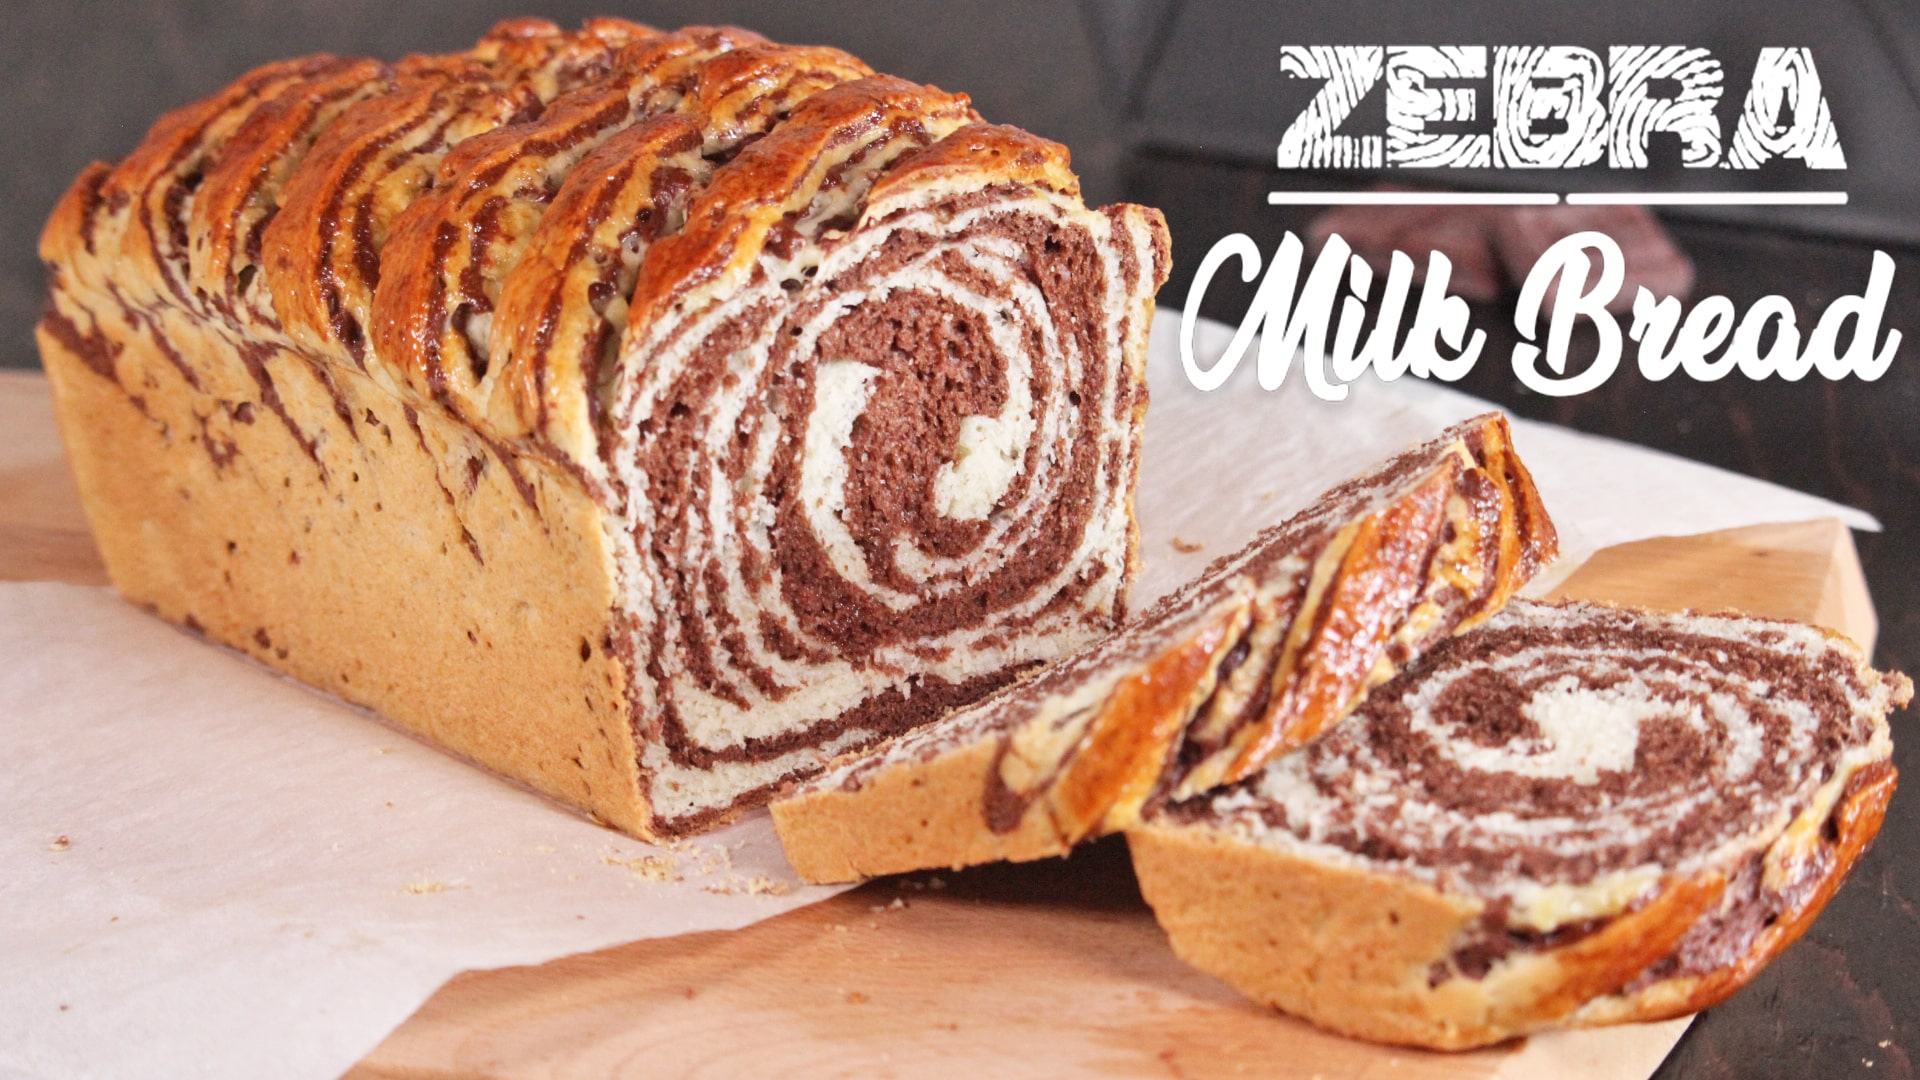
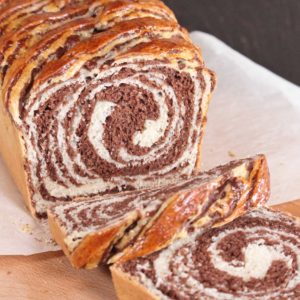
CHOCOLATE SWIRL MILK BREAD - ZEBRA MILK BREAD
Soft and fluffy Chocolate Milk Bread made without eggs and without a stand mixer: everyone can easily make it at home!Don't be fooled by its appearance: although it looks like a marbled cake, it is a delicious milk bread!Since it's a bread, it isn'tt too sweet, for this reason I think it's perfect both with sweet than savoury stuffs too...yes, even if half of it features cocoa powder! It's a rised bread so it needs at least 90-120 minutes of rising time like every bread, but you can also place the dough in refrigerator for 1 night and bake it the day after.
Ingredients
- 255 g (1 cup+1 tbsp) milk lukewarm
- 65 g (5 tbsp) sugar
- 6 g (2 tsp) active dry yest or instant yeast
- 450 g (3+3/4 cups) all purpose flour
- 1/2 tsp salt
- 60 g (1/4 cup) unsalted butter room temperature
- 20 g (3 tbsp) unsweetened cocoa powder
- 30 g (2 tbsp) water hot
Instructions
- In a large bowl mix 80 g (1/3 cup) of lukewarm milk with sugar.
- Add dry yeast on top (active or instant yeast), mix, cover the bowl with plastic wrap and let it rest for 10 minutes: you see some bubbles on top. This method is helpful to check if your yeast is still alive or if it's expired.
- Meanwhile mix together flour and salt.
- Add the rest of the milk (175 g-2/3 cup+1 tbsp) in the yeast and milk mix.
- Add gradually the flour mix into the milk mix and keep on mixing with a spoon while adding the flour.
- When the dough starts to be hard to combine with the spoon, invert it onto the work surface and well combine the ingredients kneading with your hands.
- Incorporate the butter 1 tbsp at a time: in this phase the dough become sticky but don't worry if you think it's a mess 😀 knead it and beat the dough onto the work surface. Don't add too much butter in one time and wait to add more butter until the previous one is almost incorporated.
- Keep on kneading the dough: if you think it's too sticky, start beating and folding the dough onto the work surface. It will become smooth and not sticky at all in few minutes, don't worry!
- Try to not add more flour - or add it as little as possible - during the kneading. Knead it for about 15 minutes or until turns out smooth, soft and not sticky. You can use a stand mixer, but it's not needful, it's ready in few minutes and it's satisfying to play with it with your hands 😛
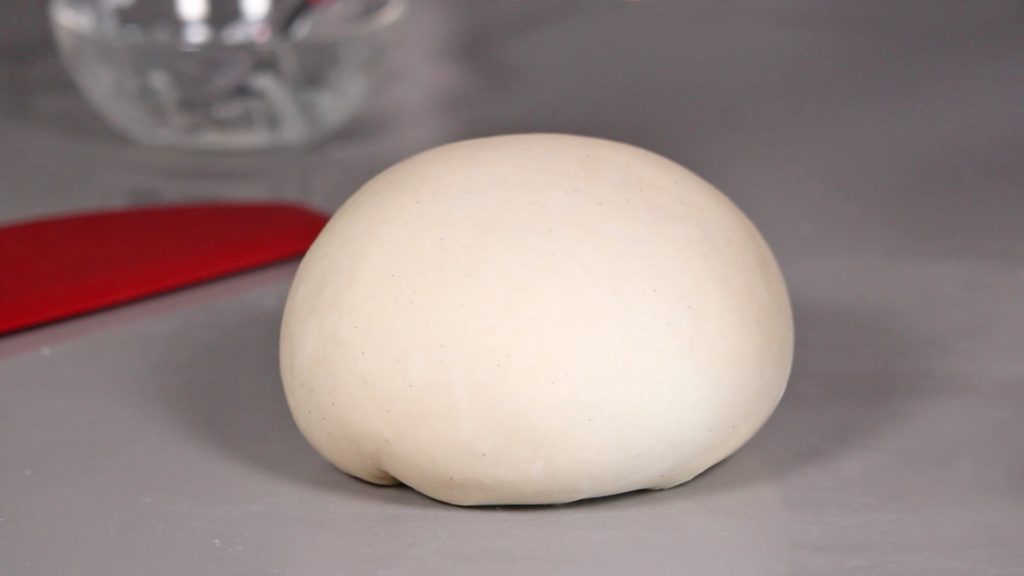
- Form into a ball and divide it into two equal pieces. Cover with plastic wrap to prevent dryness.
- Place cocoa powder into a small bowl and add the hot water: keep on mixing until reach a thick paste.
- Add the thick cocoa paste into half dough. Knead it until chocolate paste is evenly combined.
- Form white and chocolate dough into a ball a place them into two greased bowls.
- Cover the bowls with plastic wrap and let them rise into a warm place for 60-90 minutes or until double in size.
- Place the rised doughs into refrigerator for 15 minutes, so it will be easy to roll them (optional: I refrigerated my doughs because it's Summer and very hot here, you can skip this step).
- Roll two doughs into two 21x27cm-8x10,5inch rectangles.
- Overlap the two rectangles with 1/3 offset.
- Fold in three.
- Invert and roll to get about a 32x18cm-12,5x7inch rectangle.
- Roll up the rectangle from one end to another.
- Score the top of the roll and place it into a 11,5x22,5cm–4,5x9inch lined loaf pan.
- Cover with plastic wrap and let it rise at room temperature for about 30 minutes.
- Brush the top with beaten egg (optional) and bake in preheated no fan oven at 180°-350°F for about 33 minutes. After 15 minutes baking, you can cover the top with aluminium foil if too brown.
- Cool down in the pan, unmold it and serve it!
Video
Notes
You can store at room temperautre for 2 days or store slices in freezer for 1 month.
Hello, I am Valentina! Welcome to How Tasty!

I am an Italian girl in love with baking and cooking. I’ve been raised in a cooking family, baking since I was a little girl and learning from my mom and my professional chef grandma.
I created the Youtube channel How Tasty in 2017 to share with you my passion.
You don’t need to be a professional cook to follow all my recipes thanks to the video tutorials and the tips & hints you can find here.
Let’s cook!